Thursday, July 31, 2014

Zucchini and sweet potato pancakes

Zucchini and Sweet Potato Pancakes!


I can't really seem to figure out why, but most of my great recipe ideas come to me in the shower...  sorry if that's TMI!  Anyhow, I was thinking about some zucchini pancakes I saw on the food network earlier in the day, and was trying to come up  with a way to make them a bit more nutritious.  Of course, whole grain flours came to mind, but then I went to a potato pancake...  maybe sweet potato...  Marry the two!  Aha!  

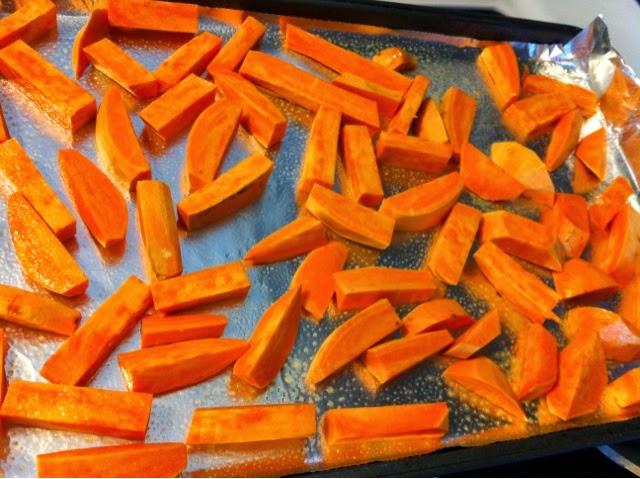
Start out the day before.  Roast one large sweet potato, wrapped in foil, at 350*, until very soft.  Next, medium grate a large zucchini, wrap in a paper towel, and press into a sift with a heavy bowl.  Refrigerate both until the next day.  


Day two, aggressively ring out the zucchini.  Aggressively!  Then, peel the sweet potato, and mash the two together with 2 green onions, finely chopped.  Add 1/2 cup of oat flour, 1/2 cup of whole wheat flour, 1 tsp. cumin, 1 tsp. hot chili powder, salt and pepper.  Mix very well, and taste for seasoning, before adding an egg.  Let rest at room temperature for at least 15 minutes so the oats and wheat flour have a chance to absorb some liquid.


Heat a large nonstick pan to medium heat, spray with olive oil, and spread out 1/4 cups of batter to about 1/4 inch thick.  Allow to cook until the bottom is browned and set, then carefully flip and brown on the other side.  It should smell amazing in your house!


Serve these with fat free Greek yogurt.  I know it sounds like a strange swap from sour cream, but as a garnish, Greek yogurt tastes almost exactly the same!  The big bonus of Greek yogurt as a garnish, is that it is much higher in protein, fat free, and has those happy little probiotics that help out your tummy!  This was our lunch today, and both my husband and my booger were thrilled!  


Caramelized onion green beans

Caramelized Onion Green Beans!

What's a way to add an explosion of flavor, with minimal calories?  Why, Caramelized onions, of course! And, contrary to most chefs' opinions, you don't need an entire stick of butter to get amazing results!  My favorite use for caramelized onions, is on green beans!  I love the silky onion texture with the still crunchy green beans, and it is a great use for frozen green beans!  So forget the thick cheese sauces, and try these instead, you'll be hooked!

Now, as a disclaimer, the onions do take a good 30 minutes to cook all the way down to a saucy texture, so make sure you have a bit of time!  Start out with 2 medium onions, sliced pretty thin.  I love to use extra sweet Maui or Vidalia onions, but any onions will do! My trick is to start them off at a medium high heat, with a fat pinch of salt and pepper, and a good splash of liquid like a stock, beer, or wine, and cover. 


Let the onions go for about 5 minutes, until translucent and soft.  this takes a good 10 minutes off the cook time, it's totally worth it!


Once the onions are soft, let them go at a medium low heat, stirring every few minutes, until they are a gorgeous brown, and sticky!  My mouth is watering, sorry!  This is when you start adding more liquid, about a cup at a time, letting it cook down each time.  You are looking to break down the sticky sweet onions to turn them into a sauce!  I like to use veggie stock, the earthy flavor goes so well with the onion and sweetness!


Now, let's talk green beans!  If you have some gorgeous purple beans from the farmer's market, don't make my mistake and use them in this recipe.  the color disappears!  Anyhow, you can either use a good frozen brand, it's a great substitute and time saver, because they are blanched and frozen straight from the farm!  

If you have some beautiful fresh beans while they are in season, nothing beats the little crunch they keep!  Start with a large salted pot of water, at a rolling boil.  Drop in your trimmed beans, and only cook for 3-5 minutes!  Drain them off, and immediately shock them in an icy water bath.  


Let them sit in the icy bath until you are ready to use them, this keeps them bright green and crunchy!


When the beans are either blanched or thawed, and the onions are dark brown and saucy, marry them together!  Let the beans cook in the sauce for an additional 5 minutes or so, until they are just pliable and have marinated in the sauce.


Don't they look delicious?


My favorite way to serve these babies, is with a perfectly husband char grilled piece of barbecue chicken!  It's a perfect combo of salty, sweet dinner heaven!


Wednesday, July 30, 2014

Greek quinoa salad

Greek Quinoa Salad

This recipe is something I like to refer to as a "salad topper".  It is a list of salads that are so versatile, you can use them several different ways!  They are great spread on a bed of lettuce, as a side dish, as a "rice bowl" topped with protein, or topping a sandwich instead of condiments!  They are usually a mix of a strong dressing, chopped veggies, and some kind of grain.

This one is a Greek flavored salad.  It starts by boiling quinoa, I used a cup of dried quinoa, boiled into a pot of 2 cups stock and smashed garlic.  It cooks up similar to rice, it will be a bit translucent when done.  

Next, Make your dressing, while the quinoa cools.  

1/4 c. red wine vinegar
1/4 c. good extra virgin olive oil
smashed garlic clove (to marinate until serving)
1/2 tsp. dried oregano, rolled in hands 
1/2 tsp. rolled Italian herbs
1 tsp. kosher salt
fresh pepper
 1 Tbsp. lemon juice
1 tsp. dijon mustard


While the quinoa is still warm, move to a medium sized bowl, and toss with dressing.  Add 1 Tbs. capers, with some brine.


Next is building the salad.  

2 medium, diced tomatoes
1 medium cucumber
1 Tbs. to 1/4 c. finely crumbled feta cheese
2 Tbs. chopped kalamata olives
2 Tbs. chopped green olives or manzanilla olives


Toss salad together, and taste for seasoning.  Let chill until ready to serve.  This is a fantastic party salad, as it is a make ahead, and even better the next day!  


Health monster pancakes


Health Monster Pancakes!

My son has been asking for pancakes for 3 mornings straight, and I remembered having made these for him as a toddler!  Pancakes are such a common breakfast in this country, most homes have the store bought version in their freezers!  They are a fantastic staple for those extra busy mornings, when the whole family is on the run, pop a pancake in the toaster or microwave, and you're good to go...  but there's one problem...  they are expensive, highly processed, and terrible for you.  Here's the solution:  Low-fat, low sugar, high fiber, high nutrient homemade pancakes!  Now, I have to give a disclaimer...  these are a different taste and texture.  Picture the texture of oatmeal cookies, and a rich, nutty, warm cinnamon flavor.  They are so delicious, just a different flavor.

Start by making your oat flour.  It's really simple, just toss a few cups of rolled oats into a blender or food processor, and whirr until you have a nice fine texture!  (It won't be quite as fine as a white wheat flour, because of the fiber, but it does the trick!)  The reason I use the whole oats, is because they have slightly different nutrients than whole wheat flour, and still have a huge amount of fiber!


Now, you need two medium sized bowls.  One gets wet ingredients, the other gets dry.  Let's start with the wet:

1 medium extremely ripe banana (I keep them in the fridge, then thaw, they break down much better)
1 1/4 cup of whatever milk or milk substitute you like
1 tsp. vanilla
1 tsp. lemon juice or vinegar
1 egg

Mix together, and start on your dry:

1/2 c. whole wheat flour
3/4 c. oat flour
1/2 c. rolled oats
1 Tbs. baking powder
1 Tbs. ground flax seeds (optional, but they pack a nutrient punch!)
1 tsp. cinnamon (optional, but it goes so well with the nutty flavor of the whole grains)


Mix the dry slowly into the wet.  This is best done with a 4 year old booger to help!  Don't worry if you don't have one, but kiddos are so much more likely to enjoy healthier foods if their hands helped with the cooking!  Now let this soupy mix sit for a good 15 minutes.  It will thicken, and the whole grains will soften as they drink up the wet mix.  The batter will also get bubbly, as the acid from the lemon juice or vinegar reacts with the baking powder.  This allows for a much moister pancake.


Now comes the pan preheat.  I use a medium low heat with our stove top, but the best way to test the pan's heat is to make the notorious "first pancake".  I make a tiny one.  When the pan is ready, I start pouring!  I like to use a measuring cup, and make each pancake about 1/4 cup, and you have to smear them out a little so they aren't too thick to cook through.  Once the edges are dry, and there are large bubbles popping in the center, they are ready to flip!  When serving, I like to do a large dollop of blueberry yogurt in place of maple syrup...  but that's because i have a weird aversion to syrup.  Do whatever sounds best to you!  These pancakes will keep you full and satisfied straight through to lunch!


Another little tip that I always use is to freeze any leftovers, or even double the batch to have leftovers to freeze!  This makes it so easy to have nutritious and convenient breakfasts for those crazy mornings!

Monday, July 28, 2014

Low carb turkey and veggie lasagna!

Low Carb Veggie Lasagna!


Who doesn't love Lasagna?  Anyone?  When I think of lasagna, I think of noodles, a heavy cheese layer, and a greasy meaty saucy layer, and it is delicious goodness!

Not everyone can afford the calories in traditional lasagna, so I came up with a slimmed down recipe that adds veggies into every corner and takes out a huge number of calories!  In fact, 1/10th of this huge lasagna is only 250 calories!


Start off  with the cheesy mix!  Mix together:


1 bag of frozen chopped spinach, thawed, and aggressively rung out!
1 can of artichokes, rinsed, drained, and aggressively rung out
salt to taste
1/2 cup pecorino romano cheese, grated
2 large eggs

Make sure to taste for salt before adding the eggs!  


In a pan over medium high heat, toss in the onions and allow to soften before adding garlic and mushrooms.  Cook until a bit of fond develops...  the browning on the bottom of the pan.  This is how you perk up a store bought sauce!
  

1 Tablespoon EVOO

2 cups mushrooms, diced
1 onion, finely diced
2 cloves garlic, grated into the pan


Once the fond is developed, and the veggies are softened, add your turkey meat.  I used 97% lean.  Don't be afraid to let the meat sit and develop a brown!  You can get away with turkey meat if you let it caramelize in the pan!  Cook until all meat is cooked and browned, then add 1 jar of your favorite spaghetti sauce.  This is the only thing not homemade in the recipe, but feel free to make your own!


1 lb. ground 97% lean turkey meat
1 jar spaghetti sauce


Let everything cook until the turkey meat is crumbled and the sauce has darkened.  Make sure all the brown bits have been picked off the bottom!  Set aside to cool down!


While the meat sauce is cooling, you can either pre-boil noodles, or slice your zucchini to use as noodles.  I used a mandolin to slice the zucchini about the thickness of a lasagna noodle, just watch those fingers!
 
Start the baking dish with a little cooking spray, then start building.  One layer of meat sauce, noodles or zucchini, cheese mix, meat sauce, noodles or zucchini...  you can figure out the rest!  End it off with the cheese mix, then shredded mozzarella and a sprinkle of Parmesan.  I love shredding my own cheese, but feel free to use pre- shredded for a more even cut.


You can freeze the pre-baked lasagna, or keep in the fridge for a  make ahead meal.  This is also fantastic to give to new parents, or someone who could use a homemade meal!  If frozen, allow to thaw for at least two days in the fridge.  Pop this in a cold oven and set to 375* for about an hour, or until hot, bubbly, and browned on the top.


For all of you non- carb fearing folks out there, I also make this into a more casual pasta bake, by pre-cooking pasta and mixing it all together!  I like to use farfalle whole wheat noodles, just under cook them by at least 2-3 minutes.  Allow the noodles to cool, and mix the meat sauce, cheese mix, and pasta all together and top with cheese.  This recipe was wiped out at our last potluck for my husband's troop, and received rave reviews!


Sunday, July 27, 2014

Lemony roasted Brussels and peppers

Lemony Roasted Brussels and Peppers!
 
For anyone who doesn't know me yet, I love veggies, colorful food, and a good tang!  Beside the fact that colorful food makes me very happy and satisfied while eating, a wide variety of colors on your plate means that you are getting a wide array of vitamins and nutrients!  It's a good little rule of thumb when trying to eat more nutritiously.  This recipe is a new one I came up with, and it is so satisfying! 
 
Start out with a pound of small Brussels sprouts, cleaned, trimmed, and cut in half.  Make sure the woody bottom, and any ugly leaves are removed!  Toss them on a greased and lined sheet pan.  Next, slice 1/2 medium yellow onion, and either one colorful bell pepper, or a good cup of sliced baby bell peppers.  I did baby bell peppers, because I get a little more color on the plate!  Arrange the veggies in an even layer on the pan, spray with oil, sprinkle with salt and pepper, and roast at 425* until tender and charred!


While your gorgeous veggies roast, make a delicious tangy dressing!  Start with one smashed garlic clove, the juice of one lemon, and an equal amount of good olive oil, a tablespoon of capers, pepper, and a teaspoon of your favorite mustard.  (I love Dijon, it is the best emulsifier)  Mix until smooth, then taste for salt.  Don't salt before, because the capers and mustard are salty!  Set aside, and let the dressing come together.  Before dressing the veggies, make sure to remove the garlic!  You just want the hint of garlic flavor, since it will be raw!


Take the veggies out just before they are cooked how you want them.  They will continue to cook for a few minutes while they cool a bit.  I love veggies with a good crunch, but feel free to let them go longer.  Just keep in mind, that Brussels tend to get a bit stinky when they over cook, and that smell will stick around in your house...


After a few minutes of cooling, mix the warm veggies with the dressing.  You can serve this either warm, or cold, we had leftovers, and they were just as delicious!  I love this so much, because you get the roasty depth, and the lemony caper salty pucker, it is such a dynamic side dish!


The night I made these, we served them over steak, and the lemon flavor works so well!  Enjoy!


Saturday, July 26, 2014

Crispy garlic roasted green beans

Crispy Garlic Roasted Green Beans
 
 
Let's start this one out by saying that I really wanted some French fries.  Like, really.  It was the 4th of July, and we were having brats and hotdogs as a special "local Wisconsin" dinner, and I really wanted some fries to go with them!  I had planned on making my usual and amazing caramelized onion green beans, but you know, fries.  And Here is my compromise!
 
 
I started out with raw, clean, trimmed green beans, tossed them in a bowl with some olive oil, a chopped garlic clove, salt and pepper.  Only use enough oil to lightly coat the beans, you don't want greasy breading!  Finish off with some whole wheat bread crumbs.  This is not intended to be a breading, more like a crispy accent, so don't go overboard!  These are still a "healthy alternative", after all!


Arrange the coated beans on a lined sheet pan in a single layer, and allow to rest while the oven preheats to 425*.


Roast those beautiful beans at 425*, until the beans are tender, and the breading is crispy.  Allow to cool, and munch away!  These are addicting, hope you made extras!!


Friday, July 25, 2014

Wasabi sesame seared ahi steaks


Wasabi Sesame Seared Ahi Tuna Steaks
 
4 years living on Oahu, HI. cemented our love of Ahi tuna, otherwise known as the Yellowfin Tuna.  It is best raw, because it is so lean, and if it's well, it might as well be out of the can...  In Hawaii, we had something called Poke (Po-kay), which is cubed raw fish, mixed with non acidic marinades, onions, sometimes seaweed or flying fish roe.  Now that we live in the Northwoods of Wisconsin, we thought our fresh ocean fish days were over!  That was, until we found an amazing grocery store about 45 min. away! 
 
The poke recipe will come another day, but for now, we will do my favorite meal from a hotel in Hawaii!  Start with your sushi grade tuna steaks.  They should be very firm.  Moist, but not soggy, and they should hold together, not fall apart.  The smell should be faintly oceanic, NOT FISHY!! 
 
When you get your fish home from the store, pat the steaks dry with paper towels.  You can either put the coating directly on the steaks, or rub a drop of toasted sesame oil on all sides.  Make the coating by using 2 parts raw sesame seeds, (the white seeds) 1 part dried wasabi powder, and a good pinch of kosher salt. 


Press the tuna steaks into the coating.  Don't be shy, get all the sides!  This is both a crunchy coating, and the seasoning, and believe me, it's delicious!  (I left one mostly bare to cook well done for my 4 year old)  Place the coated steaks in the fridge to set, and chill down.  If you want more of a medium cook, it is okay to keep them out at room temp.
 
 
 As the coating sets on the tuna, heat up your pan.  I mean, heat that baby up!  You are going to want the pan at a medium high heat, enough to make your veggie oil ripple in the pan.  You want to use an innocuous oil like a vegetable oil, canola, rapeseed...  something without a flavor, and a high smoke point!  Now, you only want enough oil to Just cover the bottom of your pan at a thin layer.  You don't want a fry, just a sear.  Once the pan comes up to heat, place the steaks, and DON'T touch till the bottom side is a very dark brown!  This will add an amazing crunch and toasted sesame flavor.  I even like the sesame slightly burned, it adds a bit of a bitter flavor. Once they are cooked, let them rest for a good 10 minutes, they will set and be easier to slice.


 My favorite ways to serve this dish is over a fresh colorful baby greens salad, with my wasabi soy ranch dressing, or over some stock boiled quinoa, with some dressed whole edamame!  Hope you enjoy!


Butternut cauliflower soup


Butternut Cauliflower Soup

It is a chilly rainy July day here in the North woods of Wisconsin.  I am trying to eat healthier, but am craving something warm and comforting!  This is the kind of cooking dilemma that gets my creative juices flowing!  I have a big, beautiful butternut squash, and think of a silky roasted soup...  and I have a cauliflower head, and think...  Perfect!! 

Now, get your muscles ready, because butternut squash is a tough little bugger!  The best way to deal with it, is to peel all the skin off, and chop the neck from the bulb.  Carefully cut the flesh of the bulb around the center seeds.  It is so much easier than dealing with the slimy seeds and strings!  Then chop the whole squash into 1" cubes, toss with olive oil, salt, pepper, and chili powder. 


The cauliflower is a much easier beast.  Start by chopping off the stem and green leaves off the bottom.  separate into 1" florets, and coat with the same olive oil, salt, pepper, and chili pepper.   


Arrange separately into a single layer, on a foil lined pan, and roast each until they are soft and charred.  Let them cool to the touch.


I like to make individual servings, and keep the roasted veggies in the fridge until the next time I want soup.  This is the fun part, you can make your soup how you want it!  My favorites are a simple thyme, sage, and cayenne soup, and a basic curry powder soup.  Add about a cup of squash and cauliflower per serving into a blender, add at least 1/2 cup of your favorite stock, coconut milk, or milk, and blend about a minute past smooth!  This will give you an unbelievably smooth, creamy, and fluffy soup that is amazing, topped with some fresh herbs, a drizzle of finishing olive oil, or balsamic vinegar!  And the best part is that it is very filling and comforting, without being heavy and calorie laden!


Thursday, July 24, 2014

Shrimp, avacado, and tomato salad


Shrimp, Avocado, and Tomato salad!

Who made the rules that state that all summer salads must contain sour cream and mayonnaise?  Why not use the fresh creamy taste of avocado to spruce up that picnic basket, salad, or sandwich?  I have a feeling that this light and satisfying salad will do just the trick! And as an added bonus, your nutrition intake will skyrocket!

The first step to this fresh salad, is to macerate, or "cold sweat" 1/4 of a vidallia onion, finely diced, and a pint of grape tomatoes, halved in some quality olive oil and a hefty teaspoon of kosher salt. Mix this together in a medium bowl, and set aside.  The salt will get to work, drawing the flavored waters out of the onions and tomatoes, creating part of the dressing!


While those go to work, it's time to boil some shrimp!  I always grab frozen raw shell on shrimp when it goes on sale, so we tend to have a variety of sizes.  Because the shrimp will be chopped after cooking, I recommend medium shell on shrimp for this salad.  I really feel that the shell adds a ton of flavor to the final product! 
 
Get a large pot of cold water, and place a smashed garlic clove, one halved citrus (orange, lemon, lime all taste great), and a hefty palm full of kosher salt, and set to high heat till a rolling boil.  Add the frozen shrimp, stir, and wait.......
when the pot of water is boiling again, the shrimp is done.  drain, and set aside to cool, before peeling and chopping to dice-sized pieces.  (I like to save the delicious shrimp broth for stir fry and soups)


While the shrimp cools, dice your avocado.  The best way is to do a vertical slice around the pit, twist open, stab the pit and twist to remove from the other half, then dice the fruit before scooping out with a large spoon.  You will get perfectly diced avocado pieces every time!


Now comes the hard part...  ready for it? 
 
Just kidding!  Mix the whole bowl together, taste for salt and add pepper, and cool in the fridge until ready to serve!  This is so good scooped on a pile of greens, on a sandwich (think lobster roll), or just as a delicious potluck addition by it's self! 
 

Sweet potato fries


Sweet potato fries!
 
Burgers need fries, right?  Well, part of the struggle of eating better, is satisfying your cravings without destroying all your efforts.  Baked fries are a great alternative to their sinfully fried cousins, but they are still mostly empty carbs.  The solution?  Sweet potatoes!  Sweet potatoes and yams are hailed as a super nutrient packed tuber that is so easily grown, that could potentially save the world hunger crisis!  I love the beautiful color and sweetness they give, but have an odd aversion to purely sweet dinner components, so sweet potato fries with salt, pepper, and hot chili powder is my JAM!  And the kicker is that it's so simple to perfect these babies!  They are even better with a nice "burn" to them.
 
Start by peeling your sweet potatoes, about 1 per person if they are fist sized.  Chop pieces about the width of typical crinkle cut fries.  This allows you to get a good char, without overcooking them to the point where they shrivel.


Toss your fries on a sheet pan lined with foil (for easy cleanup) and sprayed with oil.  Spray the tops of the fries, and sprinkle liberally with salt, pepper, and either a hint of cayenne powder, or hot chili powder.  You can also mix the fries, olive oil, and seasoning in a large bowl before placing in a single layer on the pan.  I don't have a dishwasher, so I take the easier way out!  Roast in the oven at 425* until charred on the bottom.  Give one toss, and roast until tender.  The depth of flavor is incredible! 


(sorry about the finished product picture, my husband is a kitchen vulture!)